How to Export OLM on Mac into PST?
Know Simple and Effective Way to Export OLM on Mac into PST with all the Data Items in Few Seconds

If you are shifting to Windows from Mac and before that thinking about exporting OLM to PST to access OLM file data into Windows Outlook! Then no worries at all because in the blog we will provide a trouble-free solution that will smoothly export OLM on Mac into PST with emails, contacts, calendars, and other items.
Microsoft Outlook is a popular email application that was first launched for Windows and later for Mac. It works as a personal information manager for users because it easily organizes users’ emails, contact list, calendar events, and other day-to-day essentials of users. The only issue is whenever Mac users need to move from macOS to Windows, they face challenges while trying to access OLM file on the same. Because, on Windows, the email client only accepts the file having .pst extension. Therefore, users have to export OLM on Mac into PST to make OLM file accessible to Windows Outlook.
How to Export OLM on Mac into PST?
The easy and direct procedure to export OLM on Mac into PST is by using MacMister OLM Converter for Mac. The application has dual buttons i.e. Add File(s)/Add Folder that allow users to smoothly upload .olm files/folder on the software for conversion. Additionally, the tool has a simplified interface which makes the operational process easier for professional and novice users. Even, the limited operational steps will finish the conversion of OLM to PST on Mac in minimum time.
Furthermore, Mac OLM Converter has many advanced features with the help of users can export OLM on Mac into PST according to the requirements. However, the tool has a trial edition that users can download to experience the working procedure of the software for free.
Working Steps to Export OLM on Mac to PST
Step 1. Download and run MacMister OLM Converter on Mac.

Step 2. Use dual options to add OLM files/folder on the software. Use the Add File(s) button to add OLM files on the application or opt for Add Folder button to add OLM files folder on the software for conversion. After choosing the desired option, click Next.

Step 3. Now, the tool will list .olm files on its panel with selected checkboxes one-by-one. However, you may deselect them and select the checkboxes of the necessary listed files to export only the selected OLM files to PST. Again, press the Next button to continue.

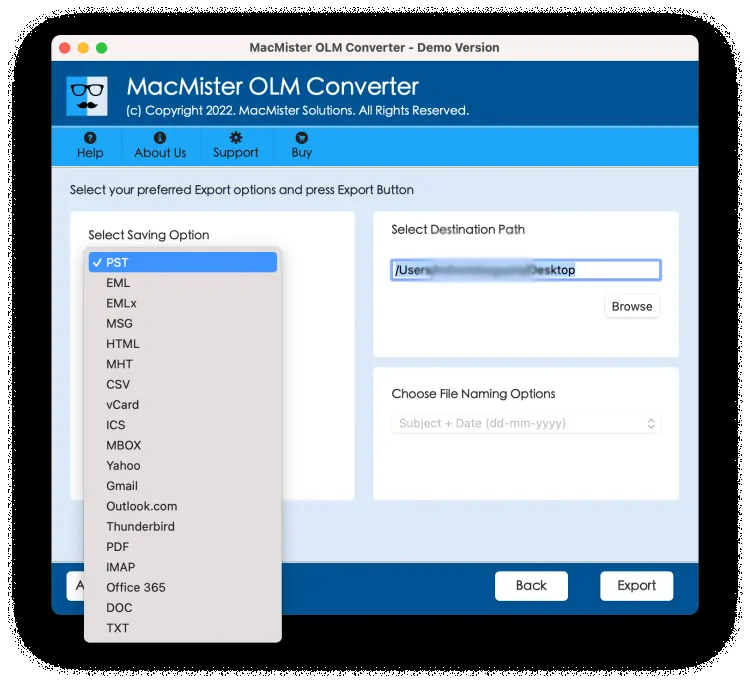
Step 4. Go to Select Saving Options to choose PST from the drop-down menu.

Step 5. Set PST options according to the requirements and press the Export button.
Step 6. The Live Conversion Report will generate which displays the live export process of OLM to PST.

The process will complete with a message “Conversion Completed”. Click on the OK button and move the resultant PST files to Windows by taking help of external drive or cloud-based service. Now, import them into Windows Outlook by using its Import/Export option. However, you may open the resultant PST file to check the results. You will see that the tool has handled the process successfully. The original data will not get affected, even the folder structure will be shown with correct structure.
Conclusion
In the blog, we have discussed the advanced method to resolve “how to export OLM on Mac to PST” with all the data items accurately. MacMister OLM Converter for Mac seamlessly adds OLM files on the software and allows users to convert them into PST with precise emails, calendars, contacts, and other items. Moreover, the powerful features of the application will help users to export OLM to PST according to the requirements. However, it is available with a trial edition. Download it for free and experience the procedure in detail by exporting first 25 OLM files into PST free of cost.
What's Your Reaction?


